
Welcome to our Basic Stages of Music Production. Learn pro stages to music production and rock your next live recording session.
We have all been there.
You start that really cool project, and you are feeling really inspired too.
You choose your best free loops, best microphones, lyrics and fire up your DAW.
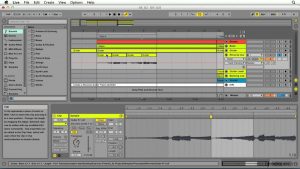
Basic Stages of Music Production – Tweaking the Setup
After five frustrating hours of messing around with presets and tweaking sounds, you realize you are completely lost.
And thus, a project is forever thrown into that unfinished projects-folder limbo. It’s just an all-too-common pitfall in music production.
But here’s the deal. You’re never too far from finishing your project. And you can reduce your workflow to a handful of simple stages:
-
Pre-Production
-
Recording
-
Editing
-
Mixing
-
Mastering
Any music production is composed of these steps. It doesn’t matter where you are in your creative process, you certainly are in (at least) one of them.
So what’s making you bloat your hard drive with terabytes of unfinished projects?
Well, for one thing, you may be trying to do all things at once.
In my first music production projects…
I often recorded a part, wasted around 30 min editing it. Only then recorded another part.
Later to find out I’d have to go back to the first recording, trash it and re-record.
All because of some idea I hadn’t thought of in the first place. Sounds familiar?
Well, I guess it’s something we have all been through at some point.
Something has definitely changed in the way I create and finish projects.
A few things to be honest. And one of them certainly is that I have created a much more linear workflow.
Later to find out I’d have to go back to the first recording, trash it and re-record. All because of some idea I hadn’t thought of in the first place. Sounds familiar?
Well, I guess it’s something we have all been through at some point. But something has definitely changed in the way I create and finish projects.
A few things to be honest. And one of them certainly is that I have created a much more linear workflow.
Pre-production stage – Don’t overdo it.
It’s hard enough as an independent artist VS the music industry. Don’t overdo it.
I have a friend who always says;
“…if you try to do everything at once, you’ll do nothing.”
My friend couldn’t be any more on the money here.
Music production is a process.
Music production is a process and understanding your workflow is important.
The finished song is the goal.
But what about the journey?
By creating clear stages you can stick through, you’ll find checkpoints to follow and make sure your productions come to a closure.
I’ll briefly write about each of these five stages below:
Pre-production stage

Pre-production stage: write down some ideas, get a few opinions and record a scratch track.
This is the first step in basically any project you pursue, be it in music or any other are.
Decisions made here are likely to impact your production the most.
Here you define arrangement, song form, tempo and overall feel of the song.
It’s also when you’ll have the chance to create scratch tracks to help you further in the decision-making process.
You can improve your workflow a lot in any music production by making the right choices here.
And I’ll break it down to you in a few steps:
Pre-Production Step – Set up the Tempo
A great pre-production tip is setting up your tempo for live recorded sessions.
If you’re independently working on your own music, feel safe to change the tempo and change it up.
Start by recording the performance to a click, so you can edit the sections and add/remove parts to taste. It will also make your life much easier later on when you’re at the editing and mixing stages of your music production (more about that later).
Pre-Production Step 2 – Create markers in your score.
Creating logical markers in your music is a norm.
Some would say it’s definitely common practice in music production.
It will make your life much easier to locate sections in the piece later.
Now, most modern DAWs allow you to do it quickly and efficiently.
Documentation is key for collaboration.
You won’t regret following a set path of naming conventions when you get older.
Pre-Production Step 3- Record Everything, Record Scratch Tracks
Usually, vocals, guitar or piano are more than enough.
Once you laid those out, it will be really easy for the rest of the band to follow.
Also, for you to listen over and over to think about the parts, sections, and arrangement.
Having everything documented helps when talking to band members or making notes on the fly.
Pre-Production Step 4- Listen to It end to end.
Most people ask for feedback before listening to their entire song end to end.
If you can’t listen to your 7minute track without skipping, your audience will feel the same.
What is the point of going through the pre-production steps if you don’t listen to what you have?
Think about what would be the best strategies for your recording session.
This is also a great chance for you to rethink decisions and even get opinions from your peers.
Prepare for the Live Recording Session
Make sure to previously create all of the necessary project files, test and choose mics, cables, and tune up the instruments.
Ensure that all the musicians have to do is come in, record and be happy about the overall experience.
Even if you are one of the musicians. Not to speak of creating a nice environment and atmosphere.
Music production is all about the journey.
It can be really frustrating to perform under unnecessary pressure or in discomfort.
This stage is also a great moment to map your music production needs and create customized default sessions and session templates to improve your workflow.
The Recording stage

Recording: Bob Dylan recording at the piano.
The second stop in our music production is recording. And, to be fair, it’s such a complex and deep experience that it’s an art of its own.
But regardless of how you approach it, there are certain steps you can take so as to make your workflow really smoothly.
And save you a lot of trouble later on during editing and mixing.
Firstly, any music production will only be as great as its weakest link. In that case, a good recording is of the greatest importance.
When you get it right from the start, then there’s very little else to do in terms of editing and mixing.
That’s not to say that it’s all on the performer.
A good choice of microphones and microphone placement, the right instrument, and timbre for the task and a lot of previous rehearsal and preparation can help make any recording memorable.
That said, nothing will cover up for a song that is weak or inexpressive. Even the room chosen to host the recording makes all of the difference.
Again, you should have made all of those decisions during the pre-production phase. But that does not mean that you can’t have new ideas or that you simply must change your plans. Adapt to what’s necessary and make sure you are registering the best musical moment possible.
The Editing stage
Editing: this cleanup stage is fundamental and may prevent many mixing issues.
But no recording will be spotless. Almost never. And this is when editing comes in to save the day.
Once you have recorded all of the takes for every vocal and instrument, all of the MIDI tracks and any samples, you can edit them out to use only the best parts of it.
That’s called comping, and it’s a really common practice in music production, if not simply necessary at times.
Make sure to create all of the comped tracks necessary, remove all unwanted clicks, pops, noises and breaths you think are taking the shine away from the performance and crossfade all splices.
In regards to vocals, just make sure that a little cleanup doesn’t turn into a sonic witchhunt, taking away from the naturality of live sound.
We are all familiar to what a human voice sounds like.
So, if you remove certain breaths or mouth noises, you may be creating an unnatural feeling to the performance.
Also, background sound removal happens here too, when applicable. As with vocals, just make sure it doesn’t turn into something outright otherworldly (unless that’s exactly your intention).
Finally, once you edit everything to taste, make sure to bounce all of the audio into a new mixing project and…
Mixing stage

Mixing: give the tracks the right balance and feel for your song.
I could write at length about mixing too, but I’ll refrain to one simple fundamental point: why are you mixing?
Of course, you could answer that you want it to sound good, or professional, or both! Well, but how are you going to do it?
I have seen it several times all across the forums and Facebook groups.
People ask if they should always compress the vocals, or always sidechain the bass, or always EQ out the low end, or always cutting the bass at 400kHz.
And the single most intelligent answer to that is the following question: does it need it?
Most of us are on the side of overdoing it.
But you don’t always have to mix each instrument the same way because “that is the right way to do things”. Especially if you managed to get a great recording right at the outset.
Some tracks will never need any EQ.
Others won’t even see any compression.
At times, the ambiance of the room is more than enough to blend the elements together.
Mixing is about finding the right balance between all of the elements in your mix, getting the listener to focus on what you want them to focus on and forget about what you want them to forget while making it sound pleasing.
So, make sure you’re in the right monitoring situation, pull up your reference tracks, sit comfortably and start asking the song what it needs. And if you pay attention closely enough, it will tell you!
Mastering stage

Mastering: it’s often recommended to have someone else with a fresh set of ears to master your track for you.
From the very beginning of music recordings to our days, technology has shaped and, at times, completely changed that way we deal with music. And mastering has changed to – a lot!
In the past, during a live performance in a recording room, the recording was cut directly to a wax disc with a stylus connected to a diaphragm. This diaphragm then was driven by an acoustic horn through which the sound was captured.
Then, these wax discs were used to make stampers, to press shellac-composite 78 rpm discs.
Today, mastering is mostly the process of fixing mix balance issues and enhancing particular sonic characteristics, giving a good mix (which usually comes in the form of a stereo file) it’s final touches and sweetening.
It also creates consistency across an album among different songs and makes it ready for distribution.
To put it simply, the point is to make sure that the mix translates well to a whole lot of different systems, such as the computer speakers, iPhone earplugs, and club etc.
I highly recommend you look for another set of ears for the purpose of mastering your songs, especially because another engineer may have a completely new perspective on how your song sounds and what it needs. Especially after you listened to it hundreds of times during the pre-production and production stages.
Conclusion
By dividing your production process into a set of phases, and those into steps, you can make sure that the end is nigh, and by the end, I mean finishing your song.
So, take that old project you gave up, or the next project you are going for, or even the current project, and map it.
Look at it and identify where you are in the process, what you need to do, and make a checklist.
With time, it will become so natural for you that all of your projects have a linear and clearly achievable chain of events, that it’s unlikely that working on a project will become a living nightmare wreaking havoc across your emotional state until you simply give up.

“Mixing Secrets for the Small Studio” by Mike Senior
As another tip, I’ll recommend the book “Mixing Secrets for the Small Studio” by Mike Senior.
It’s a great read and will clarify a lot of the pre-production and production process for you.
I hope you enjoyed reading this and that it will help you in your future productions!
Don’t forget to check our awesome library of free loops.
And leave a comment telling us at Musicblip what you think of this article and to check our other articles!