
Pre-production is one of those things that many budding music producers overlook.
We are so eager to jump straight into music creation, we often forget completely how much more creative we can get when we clear the path ahead of us.
I already mentioned the stages involved in music production. You can see what they are and how important is to know them in this article: Basic Stages of Music Production.
Pre-production is the first step in basically any project you pursue. Decisions made here are likely to impact your whole project the most.
Here you have the best opportunity to define arrangement, song form, tempo and overall feel of the song.
It’s when you book studio time, schedule dates, decide what songs will be recorded, what instruments will be needed, who will play them, what is the budget for the project etc.

Write many notes and make lists to keep your production process documented and organized.
It’s also when you’ll have the chance to create scratch tracks to help you further in the decision-making process.
And you can improve your workflow a lot in any music production project by making the right choices here.
Some of it may be much less artistic and fun than some of the other stages, and it’s kinda hard to think everything upfront, I know.
But check-lists are your best friends here. Thanks to this amazing Trello board created by Sam Lowe, from Sam Lowe Sound, you don’t have to bang your head against the wall trying to come up with every possible detail.
Now let’s take a look at some steps you can take to prepare yourself for the recording session.
Pre-Production Step 0 – Make lists, keep notes

Jotting down some ideas and exploring them prior to recording will pay off in the long run.
Make lists to keep the project organized. You’ll be referencing those later, and they’re a good way to avoid going prematurely bald.
It may sound redundant, but I’ll say it anyway: write as many notes as you can and keep clear, tidy documentation of the process.
It doesn’t matter if you use pen and paper or if you are a completely paper-free person. Use whatever method suits you best to keep track of ideas.
Pre-Production Step 1 – Record Everything, Record Scratch Tracks

You don’t need a lot to record scratch tracks. Your phone might be just about enough.
Usually, vocals and guitar or piano are more than enough.
The cool thing about it is that you can even use your phone to record your scratch tracks.
Just sit down on your living room, relax, get a guitar and start recording.
Alternatively, you can record your scratch track to a metronome straight into the DAW to see how it will turn out.
Now you have the chance to listen to it over and over to think about the parts, sections, and arrangement.
Perhaps you could even use it as a guide for the recording sessions.
Having everything documented helps when talking to band members or making changes on the fly.
Pre-Production Step 2 – Set up the Tempo

Setting up the tempo.
A great pre-production tip is setting up the tempo for live recording sessions.
If you’re independently working on your own music, feel free to change the tempo and experiment with it.
And if you’re working for a client, it can help you both get a good feel for the song.
Start by recording the performance to a click, so you can edit the sections and add/remove parts to taste.
It will make your life much easier later on when you’re at the editing and mixing stages of your music production (more about that later). It’s a really useful thing to practice the songs to a click, too.
Have everyone in the band to practice the songs against a metronome so there are as few awkward moments as possible during the recording sessions.
But be ready to ditch the metronome completely during the recording sessions if necessary too. A tic-toc should never be in the way of a great performance.
Pre-Production Step 3 – Create markers in your score.
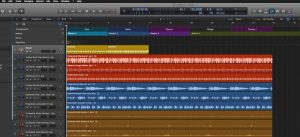
Creating markers in your DAW will help you organize your musical ideas.
Creating logical markers in your music is a norm. Some would say it’s definitely common practice in music production.
Make sure to get all of the songs written down, as clearly as possible. It will make your life much easier to locate sections in the piece later.
And make sure everyone gets copies of them.
If you are working strictly in the box, most modern DAWs allow you to do it quickly and efficiently too.
Documentation is key for collaboration. You won’t regret following a set path of naming conventions as you get older and more experienced.
Pre-Production Step 4 – Listen to It end to end

You get a Coolness Badge if you are listening to your scratch tracks on this.
Most people ask for feedback before listening to their entire song end to end.
If you can’t listen to your 7-minute track without skipping, your audience will feel the same.
What is the point of going through the pre-production steps if you don’t listen to what you have?
This is a great chance for you to rethink decisions and even get opinions from your peers – something I highly recommend.
Think about what would be the best strategies for your recording session.
Pre-Production Step 5 – Prepare for the Live Recording Session
The recording session itself requires preparation too. At least fire up your DAW before everyone arrives!
This is when you ensure that the musicians only need to come in, perform on the microphones and be happy about the overall experience. Even if you are one of the musicians.
Not to speak of creating a nice environment and atmosphere.
All preparation steps taken here are quite crucial and will pay off later on.
Send lists to everyone involved with everything they need to do and bring to for the recording sessions – and ensure that they got your emails!
Make sure to previously create all of the necessary project files, test and choose microphones and cables.
Tune up the instruments, get spare strings, spare batteries, drumsticks etc.
When booking studio time, make sure to visit place. Write down anything they will make available for you and confirm that it will all be available by then.
Once it’s all ready, double check everything and you’re ready to start recording.
Music production is all about the journey.
It can be really frustrating to perform under unnecessary pressure or in discomfort. So step back and plan ahead.
This stage is also a great moment to map your music production needs and create customized default sessions and session templates to improve your workflow.